Thursday, July 5, 2012

Add A Little Twist!

Hey Girls! Today I'm making a post on how to do 4 different types of braids on yourself. I'll be talking about French Braiding, 4 strand braid, and the ever popular fishtail braid! Keep reading to see how to make them! **Some of these are complicated to explain, I will link a Youtube video to each at the end if you need further help!** Note: You will need to know how to do a simple 3 strand braid for these styles, if you do not know how, do not fear! There are plenty of videos to teach you how!

Fishtail Braid: This braid is a little complicated to explain, but I will try my very best. What you are going to do is divide your hair into 2 sections. Then take a small section from the outer part of one side and cross it over to the inside of the other. (See what I mean, sounds confusing but I promise it's not that hard once you get the hang of it!) Then repeat that with a strand from the other side. Continue this all the way down alternating sections and secure with an elastic. if you are having trouble starting the braid, it is easier for some to secure the hair with a clear elastic at the top and cut it out when finished. Click here if you need more help!

French Braid: This will start by taking a section from the very top of your head. Then divide into 3 sections and braid normally one cycle (left over right, right over left ONCE) Then before passing your left over right again, pick up some hair hanging down and incorporate it with the starting section and braid in. Do that with the opposite side and continue to the nape of your neck. Some people choose to secure here and leave the rest as a hanging ponytail, which I personally don't care for. If you wish to continue, keep braiding normally until you feel you cannot reach, then bring it around your shoulder and to the front and finish, then securing with an elastic and returning to the back. Here is a video if you should need it!

4 Strand Braid: For this, you will start by securing your hair in a clear elastic. Then, divide your hair int 4 equal sections, and I'll admit that I use my mouth to help me hold them! Then you will sort of weave the first piece through the other 3. Go over, under over, then the 1st piece will become the last. now repeat that with the new 1st piece until you run out of hair. Secure with an elastic and remove the top one. This video is fantastic! I have it set to the right place for you!


Thanks for reading! Comment below with any questions!

Xoxo Audrey
"She turned her cant's into cans and her dreams into plans." -Kate Spade

Sunday, June 24, 2012

Sparkling Summer Makeup and Summer Makeup Tips!

Hello everyone! Just wanted to get it out there now, our school had finals last week, so we didn't have a lot of time to manage studying, other school work, and the blog! Summer  is here for most of y'all, so I figured I would do a makeup tutorial that was perfect for going out in the summer day or night! This look is minimal, but the ending result is gorgeous! Keep on reading to find out how you can achieve this gorgeous look. By the way, I apologize in advanced for the pictures....they're not the best!


When it's 87 degrees out, it feels absolutely disgusting to be wearing a high coverage foundation. I personally do not reccomend it at all (as it can clog your pores!!!) and if you really feel that you need some kind of coverage, go with a tinted moisturizer. If you don't want to spend a lot, the Covergirl AquaSmoother Tinted Moisturizer is fantastic! Anyway, back to the tutorial (: .  I am going to apply my Laura Mercier secret Concealer under my eyes, and on any other problematic areas. After my concealer has been applied, I am going to put a dusting of my Maybelline Dream Matte Powder. As I have mentioned before, I tend to have super oily skin during the summer months, so this powder keeps me matte and evens out my skin tone.


Whether you are super tan or not, it's always great to add some bronzer to give a bit of a glow. I am using my FAVORITE Nars Laguna Bronzer and applying it to my face using the 3-E trick. Also, I am going to contour my face by making a fish face and putting the bronzer in the hollows of my cheeks. Now for blush- if you have dry skin I would go ahead and put on your favorite cream blush. This gives you a much more radiant glow to your skin, and make it seem like your skin isn't as dry as it is!  If you have oily skin like me, I would play it safe using a powder blush. Powder blush is not going to slide off of your face unlike the cream blush. Use your favorite setting spray or setting powder, and your face is good to go! Make sure you are using a blush that goes nicely with your skin tone.


I love a simple, sparkly eye in the summer! Eyeshadows that are neutral toned look great on your skin in the summer, and won't give the effect of wearing cakey products. I am going to start off by applying an eye primer. I use benefit's "Stay Don't Stray", but use which ever one works best for you! Blend the product from your lid to your browbone, and any extra on your lashline/inner corner with your finger. Using your finger helps melt the product into your skin so it blends beautifully! Next, I am going to take Mac's paintpot in "Bare Study". I absolutely LOVE this product and it's perfect for the summer. Blend that all over your lid using your index finger. Keep in mind that any champagne cream shadow will work for this. Then, taking a pencil brush put a shadow that is one shade lighter than your cream shadow. I am using Lancome's "Honeymoon" for this step. Apply the shadow in your inner corner and on your lower lashline. Using the same brush dip it into a matte brown. I love Lancome's "Mochaccino", and you are going to apply the brown color on your outer half of the lower lashline.


Curl your lashes and apply your favorite waterproof mascara. If you want to amp this up for a summer night out, take Maybelline's Line Stiletto or your favorite liquid liner and create a thick line with a wing. This turns this into a night look but still allows the "summer simplicity" look we are going for.


Finish off with a pink gloss and you are good to go!

Write in the comments below what type of blog you guys would like to see next! Hope you guys are having a great summer, and don't forget...stay classy!


-Landon


Get Naked....2

Hi Ladies!


I am SO sorry it has taken me so long to put up another blog post. Like Audrey had said, we have all been busy with school work and such, but it is summer now, and I have a lot more spare time to blog it up for you all! ;) YAY! Happy summer everyone!


So today I wanted to give a review on one of my palettes I have been LOVING so far this year. (If you couldn't tell by the title YES I am talking about the one, the only, Naked 2 palette from Urban Decay). I bought this baby probably about 3 or 4 months ago and have used it almost every single day! It comes with 12 gorgeous colors that allow you to make countless looks with never ending color combinations. I am not one to wear a green smoke eye to school or a blue eyeshadow on my lid, I tend to lean more towards neutrals *and maybe purples on occasion* because I am not as daring as some other guru's out there. :) But a neutral eye is something I love because it's easy to layer, and it allows you to feel like you have makeup on, without over-doing it.

The colors in this palette like I mentioned above are simply GORGEOUS. From left to right the color names are: Foxy, Half Baked, Bootycall, Chopper, Tease, Snakebite, Suspect, Pistol, Verve, YDK, Busted and Blackout. All colors are highly pigmented, and are very easy to work with. Every shade accept Foxy, Tease and Blackout have a shimmer to them, which is nice but limits when and where you can wear those specific shadows. I am a glitter person so I don't have a problem wearing Half Baked on my lid and Tease in my crease. I personally enjoy a little sparkle...which is why I enjoy this palette so much because a lot of the colors have a special glimmer to them. But to balance it out, these few matte colors allow you to combine and mix different colors for various looks. 

My favorite combination of colors is Bootycall on my lid, with suspect and tease in my crease. I blend it so it gives a little bit of an ombre affect into my outer corner and creates a natural smoke eye. If i want to accentuate it even more for evening, I blend a little bit of blackout into the crease to intensify it! But with 12 different beautiful colors, your combinations are endless! Each color seems to compliment each other and I love how smoothly they are applied to my eye. The shadows don't crumble, the formula is nice and you only need to use a tiny little bit to get the color payoff you are looking for! 

The best part about this palette? It's only $50! Which may sound like a lot, BUT when you think about it, you are getting 12 different colors, which divided by 50 is $4.16 for each shadow...FOR A HIGH END URBAN DECAY SHADOW...THAT'S SUCH A STEAL PEOPLE. Like go get you some...RIGHT NOW.They're great colors, with great pigmentation, that look great on ALL SKIN TONES! 

Overall I think this palette is a perfect go-to collection of colors that are great for either a subtle look for school, or a classy look for a fun night out!

Let me know in the comments below if you have this palette, and what your favorite color combinations are! 

xoxo,

Kristin

Monday, June 18, 2012

How to Wash your Makeup Brushes!

Hey girls! I want to start off by saying I am making no excuses for not posting in a while and I take full blame. I have been so busy with end of the year cramming and finals, but summer is right around the corner and I will have all the time in the world for blogging! So without further ado, today's post is a tutorial on how to clean makeup brushes!

The brushes that I own are the Sigma Essential Kit. These brushes are amazing and they are a bit on the pricey side, but they're a steal when you compare them to some other high end companies. I also use Mac Brush Cleanser which I put a spray cap on to make it easier to use. (For the deep cleaning pictures I had not yet changed the caps so it still has the original pour cap!)

Spot Cleaning: I recommend spot cleaning your brushes about every other day, especially foundation and concealer brushes! Because daily dirt and germs can easily make their way to your brushes, you don't want to be putting that onto your face.

What You'll Need: A paper towel or hand towel, brush cleanser and your brushes!


Step 1: On the paper towel or directly on the brush, put a little bit of cleanser, so that it is damp, but not soaked.


 Step 2: Wipe your brush back and forth (for shaped brushes) or in a circle (for circular brushes). You will see product coming off and the brush getting cleaner. Some brushes will require this more than one time depending on the usage and how much product is on it.


Step 3: When you can wipe the brush on the paper towel and no product comes off you are finished! Discard the dirty paper towels (Ew!)


Now your brushes will be squeaky clean...but make sure you let them dry out before using them again!


Deep Cleaning: I deep clean my brushes about every week. I hate using dirty brushes and really like my brushes to be fresh on my face. It's important to deep clean as well as spot cleaning to make sure you are really getting everything off.

What You'll Need: A few paper towels, brush cleanser, sink, and brushes!

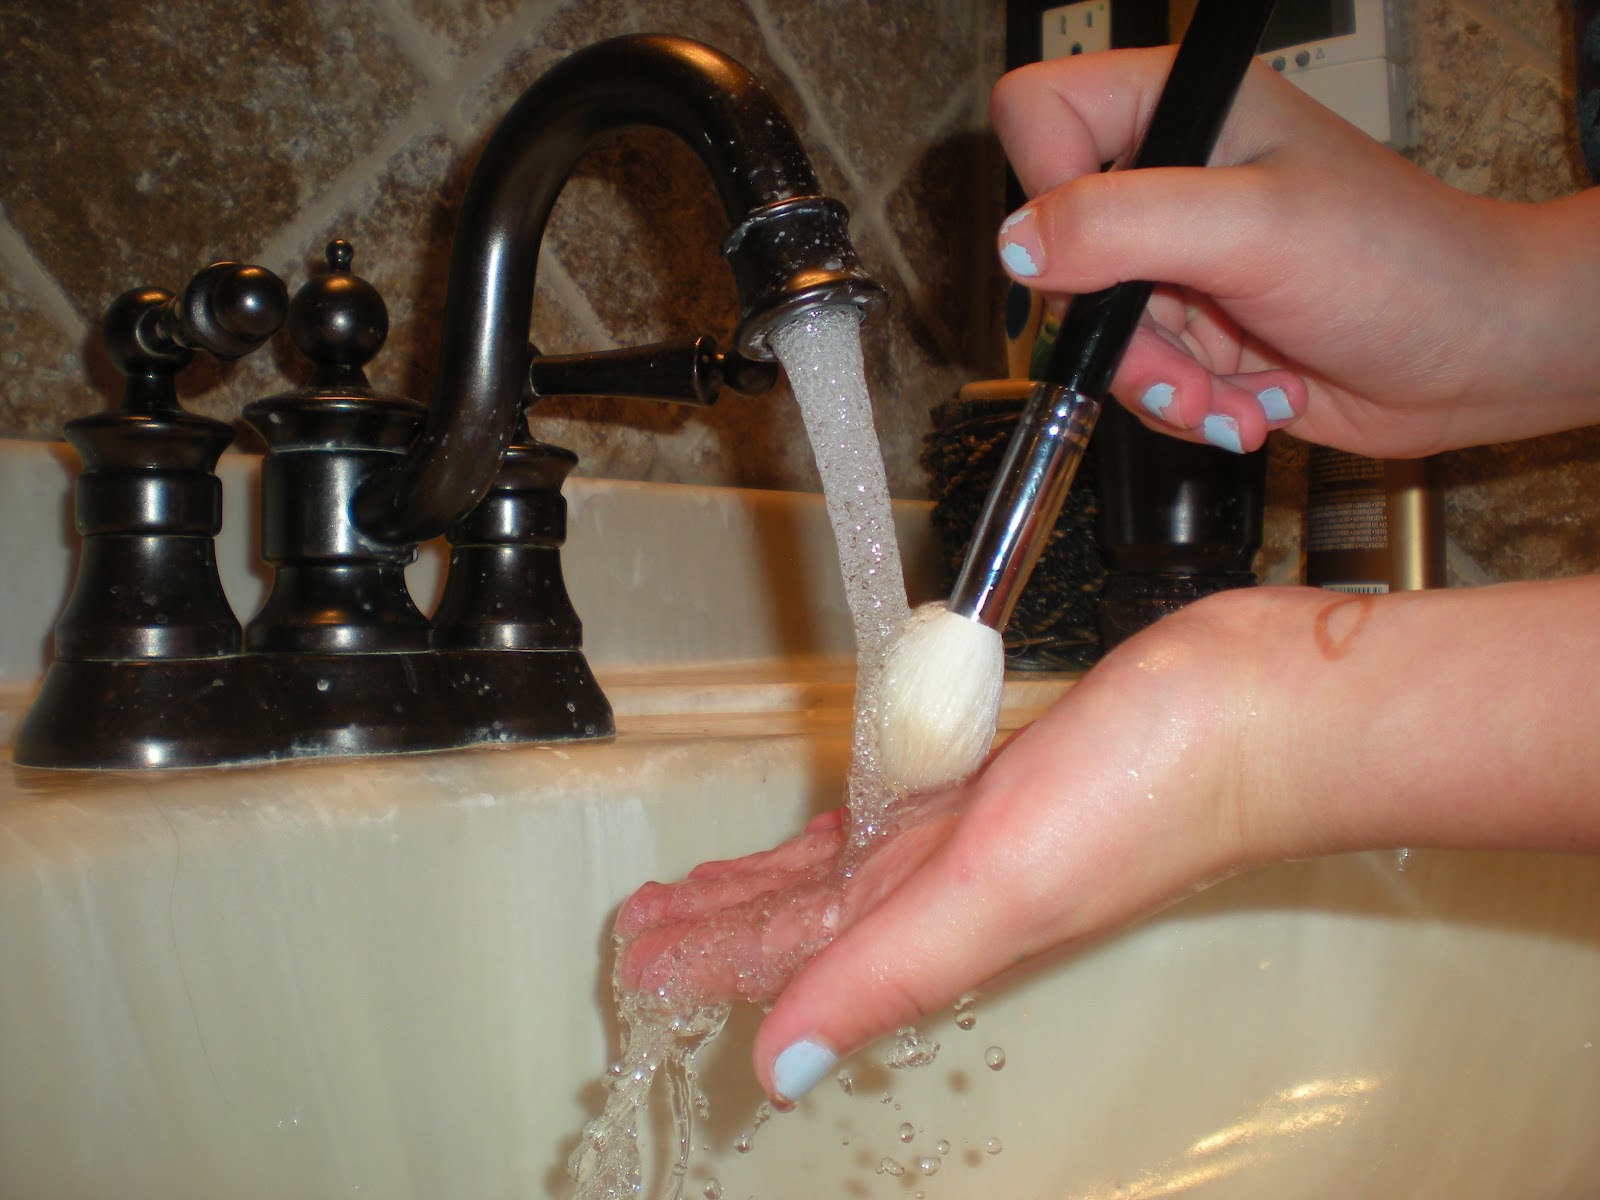
Step 1: Turn on the water!

Step 2: Put your brush under the running water to get it wet, but be very careful! You do not want to get the ferrule (the metal part) wet because it will loosen the glue and make your brushes fall apart!


Step 3: Put a small amount of cleanser either directly on your brush or in your hand, whichever you prefer, then swirl around in your hand rinsing in between to get off the dirt coming off!


Step 4: Rinse the brush when no more product is coming off.


Step 5: Wipe off any excess dripping water on a paper towel.
Step 6: When drying your brushes you want them to be upside down so no water drips into the ferrule and loosens it. I tape mine hanging onto the side of an old nightstand or the wall.

In the morning remove them and they should be totally dry. Thanks for reading and comment below with any questions. Love you all!

Xoxo, Audrey

"She tucked her coral lipstick away and floated back to the party." -Kate Spade <3


Friday, June 1, 2012

May Favorites!

Hey Beauties!
It is that time of the month where one of the four of us talk about our favorite items we have been loving lately! This month actually seemed to fly by so fast. It's getting really warm where we live....abnormally warm and the thought of that leads me to summer. It seems like it can't come fast enough! School is coming to a close in less than a month, and we have been so busy lately with all of our end-of-the-year schoolwork that we haven't been able to post as much as we would have liked to. BUT NEVER FEAR. We are back and have tons of secrets to share with you all. :) Now on to the good stuff....


My first favorite is one that every beauty guru seemed to be obsessed with when it was first released: The Naked 2. I will have a full review out very soon so stay tuned for that, but basically it is my go-to eye palette for any neutral look. All of the colors are absolutely gorgeous and I love how pigmented they are. I could ramble on forever about my love for this palette but I will save that for the full review! In the beginning this was supposed to be a limited edition palette, but there was such a high demand for it that they decided to make it a permanent palette for all Urban Decay lovers. It can be found here!


My next favorite is a necessity for myself when applying makeup. My skin-like I have said before- is a very weird texture. In some places it gets oily, in some places it's very dry...it changes constantly *I know annoying right?* This dramatically different lotion from Clinique helps fix that. I put this on before anything else in the morning, as well as right before I go to sleep. It moisturizes the dry parts of skin on my face and allows the foundation to blend into my skin much easier. I LOVE this product and DEFINITELY will be re-purchasing it. :)


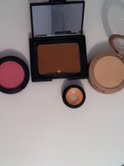
One thing that I always try to reach for is a nice blush. From natural colors *like mac's warm soul* to bright pinks and corals, I think a pinch of color on the cheeks really completes a look. (And since I have such fair skin, it keeps me from looking like a ghost). The blush you see on your right is called Mata Hari from Nars and I have been loving it! It looks a little bit more muddy in the picture, but in real life its a gorgeous pink color which works very well with my skin tone. If I apply a sheer amount, it gives me a nice tint of color, but if I pack it on, its a bright pink which would be a fun pop of color to add to a subtle look. Nars is on the more expensive side *I know...* but, I totally think it's worth the money in the end.


Ah, foundation. Either your worst nightmare, or your best friend. Some people have trouble finding the right shade for their skin tone, or aren't able to apply it correctly, but if done right, a good foundation can give your face a flawless looking finish. Personally, I don't think it's worth spending a lot of money on foundations, I haven't really experimented much in the high end brands of foundation, but I have really been enjoying the Cover Girl Clean foundation for this month. I am in the color 105 Ivory and the smell is amazing. It smells very...well...clean! :) I only need about the size of a  nickel to cover my whole face evenly and it has full coverage which is nice for all of the blemishes and freckles I tend to cover up. This foundation has lasted me about one and a half months and for the price *between $8 and $10 I forget to be honest with you...* it's definitely worth giving it a try. With 12 different color options, there is bound to be one that is close to your skin tone! I will definitely re-purchase this one in the future because I love the way it feels on my skin!


Moving right along to lips...Babylips chapstick has been the ONLY chapstick I have been reaching for lately. Especially the one on the right called Quenched. I put red one (Cherry Me) next to it to show how much of quenched I have used! I literally always have it on me! It is THE most moisturizing chapstick I have ever used. I re-apply like a madwoman and I LOVE the way it smells! I love the colored ones too, but I don't reach for them as much as the clear one. The colored ones have a lot of pigmentation in them which is nice, but it's more like a sheer lipstick than a chapstick. I can't throw on the colored ones without a mirror! I will re-purchase this over and over again and if you haven't tried these yet I would DEFINITELY recommend checking them out. They're less than $5 too!


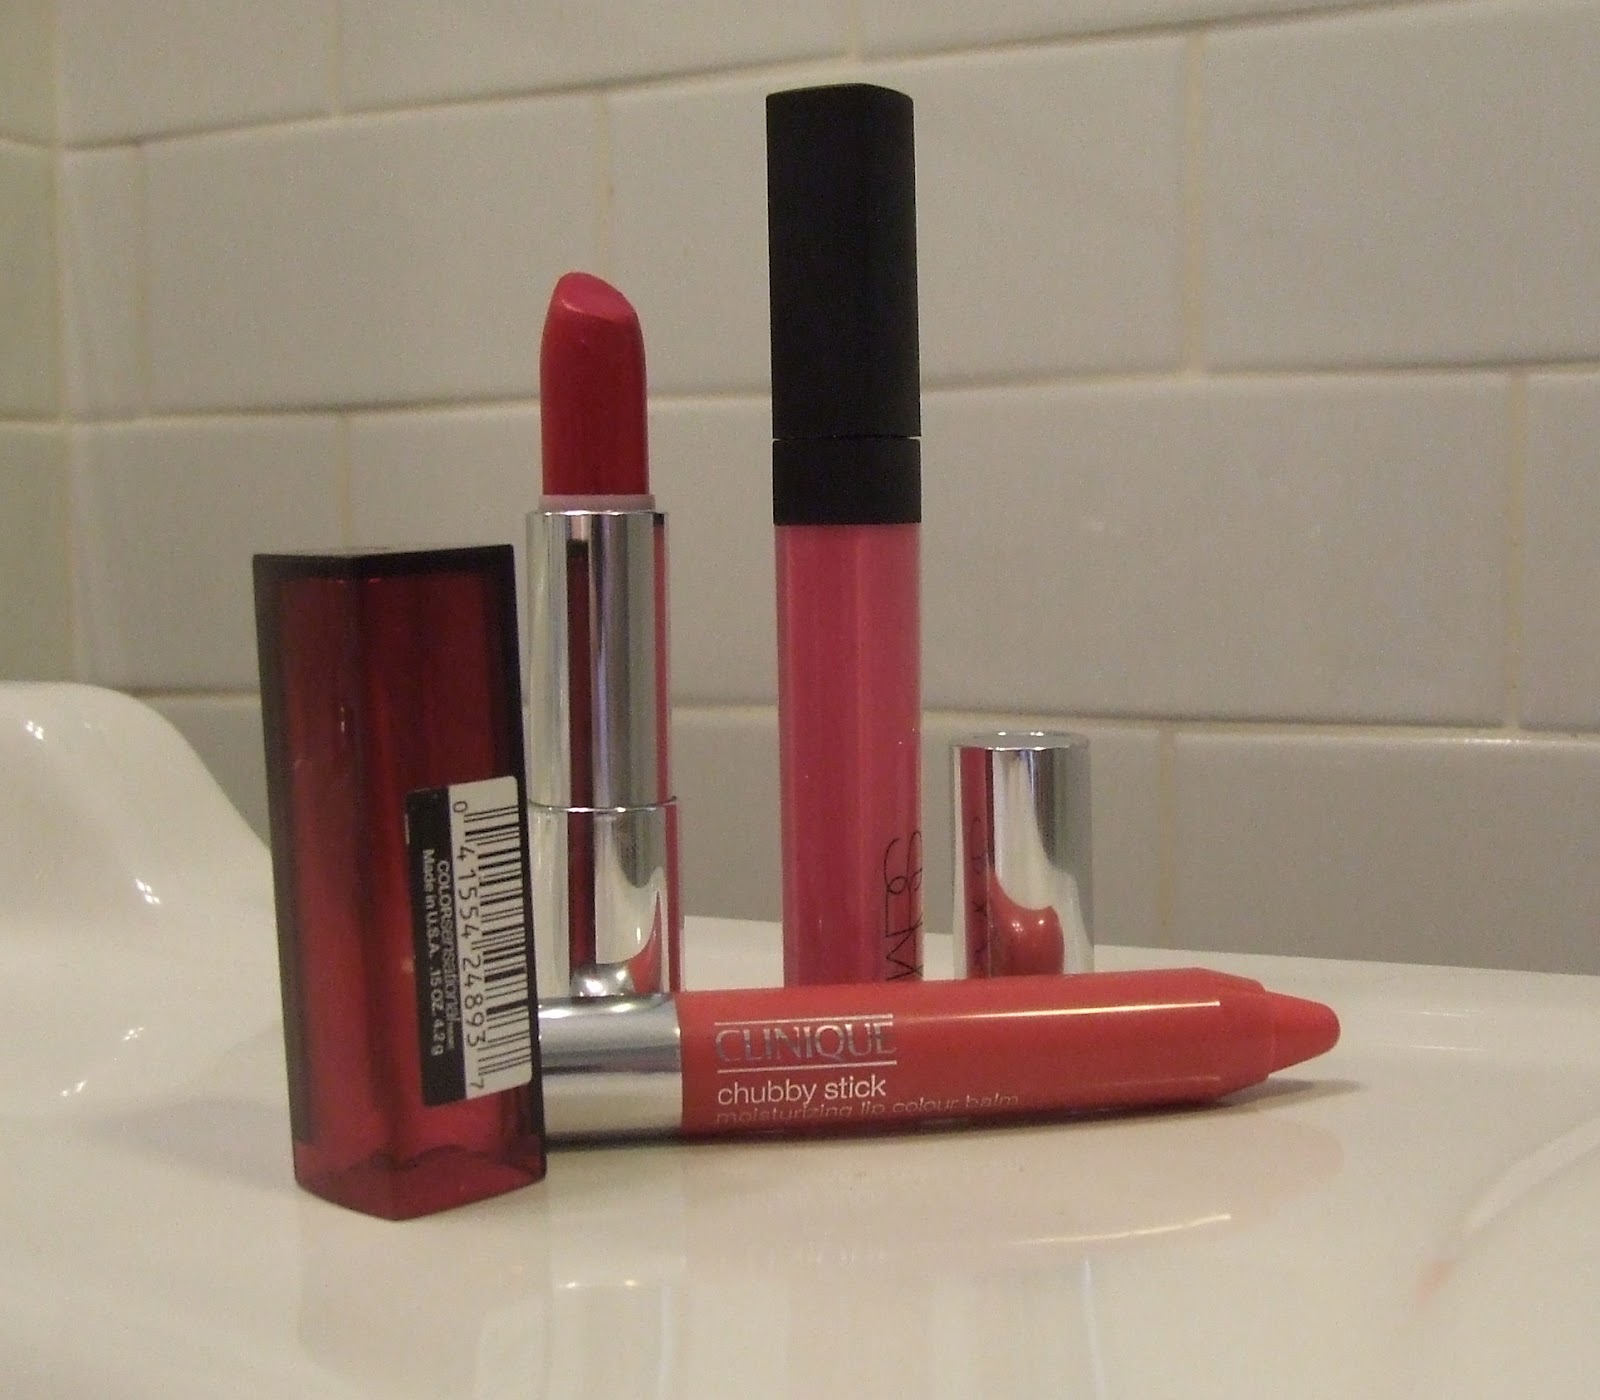
A few more lip products that I have been loving are bright pinks. *Don't worry girls...I don't rock a bright lip with a bright cheek in the same look ;)* But these three lip products are all fun pinks that bring life to my lips, and the clinique chubby stick in Curvy Candy is especially nice because it's super moisturizing! The lipstick on the left is Maybelline number 160 in 5th Ave. Fuchsia which is a BRIGHT fuchsia color which I love and if I decide to wear that I normally top it with a Nars gloss in Coeur Sucre. These three staples are perfect for a pop of color to any spring--or now summer---outfit!


This is kind of just a random one, but I just got a pair of toms -my first of many hopefully ;) - and I love how comfortable they are! I also love how each pair someone buys, a pair is sent to a child who needs them. It's nice to know that my money is going towards some sort of nice cause. I couldn't decide between navy and black, but ended up going with navy because I don't really have any shoes in that color. I love being able to slip these on and walk out the door and not have to worry about keeping them in mint condition. These are definitely going to be a staple for me this summer and I hope to add more to my collection in the future! 


Now this last favorite I cannot take credit for. Both myself and Audrey have been doing our research about Lilly Pulitzer and found out that she makes limited edition boxes of Barnum's Animal crackers. When I was little they were my absolute FAVORITE food. I could eat them all day long! We began to go on a hunt for them and Audrey found them and picked one up for me! There are only 2 million made each year and all the proceeds go to OprationSmile which I love, so of course this was a win-win situation for me. Plus the box is just absolutely adorable! So I had to give it a special spot in my favorites, how could I not?!


Ok girls, so this is everything that I have been loving this month. How about you? What are some of your favorite things you have been loving this month? Leave a comment down in the comments below! Especially beauty products, I am always looking to try new products!
Love you all and have a great weekend!


xoxo,
Kristin

Wednesday, May 30, 2012

Sun Hats

Hey girlies! With summer approaching, and some finalizing of your summer vacation plans, I thought it would be a great idea to do a blog on sun hats. I was never a fan of sun hats before, I honestly didn't know why people wanted to buy them! However; with one quick shopping trip with my Nana...I changed my mind completely!


You walk into your favorite department store, and are suddenly surrounded by all of the new merchandise that corresponds with the latest trends! What was I bombarded by you ask? Sun hats. So, I went looking around for fun, trying on a few and before I knew it.... I fell in love with the sun hats! This sunhat was purchased at Nordstrom, but unfortunately I took the price tag off (In the picture I know there is a tag but that's the brand/name tag) and I have no clue how much it was! Sorry guys!! However; this hat is by the brand "ViX" and I found this particular hat in the sale section, so if you're looking for a sunhat like this one I definitely recommend looking in the sale section.


This sunhat is definitely me! I love how it has some sparkle incoorporated into it, and the braided "belt" adds even more flare. 
Some of you may be wondering "Where can I buy a sunhat without the department store prices?" Don't worry...I got you covered! Stores like,  Everything But Water has an amazing selection, and even Forever 21 have some really cute ones! I think when buying a "statement" hat you have to purchase one in the end that you feel comfortable in, and are going to reach for in the summertime!


Here are a few simple ways to style your hair around your sunhat, and some cute outfit ideas as well!
Firstly, I would embrace your natural hair! If your hair is a little frizzy, or has no volume buy a product from the drugstore that can enhance your hair and simply add the sunhat. It will become the focus of your head, rather than the hair you try to hide (I definitely fall under this category....my straightner tends to be my bestfriend...).
Secondly, go for either pin-straight hair or some curls! Expierament with whichever style you like better and add the sunhat. I think both straight hair and curled hair look great with a bigger statement piece!


As for outfits, I think a sunhat with a girly, flirty dress would look SO CUTE. Like sooo cute! I love wearing a simple girly piece and adding some type of statement piece to dress it up. This summer, I will totally be rocking the sundress with my sunhat for dinner with the family, or on vacation. You have endless outfit choices by adding a sunhat!


To the beach? Rock your favorite bathing suit with a cute coverup, add your sunhat and get out that door! You will be turning heads (in a AH-MAZING way) with your on-trend fashion!
Want to hang out with your girls? Put on your favorite pair of denim shorts, a solid, pastel v-neck, a pair of super cute sandals and add that hat!


I hope you guys enjoyed today's post. I've obviously grown to like them, and I'm hoping this post helped you choose whether you are going to purchase a sunhat or not! Please leave a comment down below on whether you are going to rock sunhats, or stay away from them completely! Any requests for blogs you would like to see in the future? Comment below (: Don't forget, stay classy!


-Landon


Sunday, May 27, 2012

Review: Mane and Tail

Hey girls! Today I just wanted to do a review of the Mane and Tail Shampoo and the Mane and Tail Moisturizing Texturizing Conditioner. Before I start to go into details I just want to put it out there that I've yet to finish the bottles and you'll see why later on.

While it did make my hair grow faster it did nothing to repair my hair; if anything it made my hair more damaged than before. I have terrible split ends to the point where if I needed them cut off I could have to get a buzz cut or something, it's horrendous. I have very thick, frizzy, coarse and dry hair which is never moisturized enough and extremely hard to style. I don't know why my spilt ends are so bad because I make sure to always use a heat protectant and go extra miles to keep it looking healthy but it never does. After reading reviews online I thought it was going to be a moisturizing set and help my hair get shine and repair.

Shampoo: I'm pretty sure this made my hair drier than it was initially and it completely stripped it of any good oils or shine. Even my sister (who has straight oily hair-the total opposite of mine) used it and asked me why I kept on using it as it even dried out her hair. It promised to increase hair growth which I guess it did, but as I have long hair to begin with I didn't notice a big gain.

Conditioner: I used significantly more of this than the shampoo and I'm actually almost finished with it, but it's not because I loved it or anything. I needed to use so much of it because the shampoo was so drying. I didn't like the consistency at all, it was runny and didn't stay on my hair well, it seemed to slid of a lot. Even thought I used a good amount of it each time I still needed to use a deep conditioner than I usually did.

Overall I'm not going to finish these bottles and I'll most likely end up throwing them away because I'm not going to give them to anyone-they'll probably hate me. I will definitely not be repurchasing ever and my only saving grace was my Matrix Biolage Conditioning Balm, which I use as a deep conditioner. If I didn't use that I don't know where my hair would be right now. Oh well, you win some you lose some, so I'm off to find a new shampoo and conditioner.

Xoxo Audrey :)
"If I'm honest I have to tell you I still read fairy-tales and I like them best of all." -Audrey Hepburn