Wednesday, May 30, 2012

Sun Hats

Hey girlies! With summer approaching, and some finalizing of your summer vacation plans, I thought it would be a great idea to do a blog on sun hats. I was never a fan of sun hats before, I honestly didn't know why people wanted to buy them! However; with one quick shopping trip with my Nana...I changed my mind completely!


You walk into your favorite department store, and are suddenly surrounded by all of the new merchandise that corresponds with the latest trends! What was I bombarded by you ask? Sun hats. So, I went looking around for fun, trying on a few and before I knew it.... I fell in love with the sun hats! This sunhat was purchased at Nordstrom, but unfortunately I took the price tag off (In the picture I know there is a tag but that's the brand/name tag) and I have no clue how much it was! Sorry guys!! However; this hat is by the brand "ViX" and I found this particular hat in the sale section, so if you're looking for a sunhat like this one I definitely recommend looking in the sale section.


This sunhat is definitely me! I love how it has some sparkle incoorporated into it, and the braided "belt" adds even more flare. 
Some of you may be wondering "Where can I buy a sunhat without the department store prices?" Don't worry...I got you covered! Stores like,  Everything But Water has an amazing selection, and even Forever 21 have some really cute ones! I think when buying a "statement" hat you have to purchase one in the end that you feel comfortable in, and are going to reach for in the summertime!


Here are a few simple ways to style your hair around your sunhat, and some cute outfit ideas as well!
Firstly, I would embrace your natural hair! If your hair is a little frizzy, or has no volume buy a product from the drugstore that can enhance your hair and simply add the sunhat. It will become the focus of your head, rather than the hair you try to hide (I definitely fall under this category....my straightner tends to be my bestfriend...).
Secondly, go for either pin-straight hair or some curls! Expierament with whichever style you like better and add the sunhat. I think both straight hair and curled hair look great with a bigger statement piece!


As for outfits, I think a sunhat with a girly, flirty dress would look SO CUTE. Like sooo cute! I love wearing a simple girly piece and adding some type of statement piece to dress it up. This summer, I will totally be rocking the sundress with my sunhat for dinner with the family, or on vacation. You have endless outfit choices by adding a sunhat!


To the beach? Rock your favorite bathing suit with a cute coverup, add your sunhat and get out that door! You will be turning heads (in a AH-MAZING way) with your on-trend fashion!
Want to hang out with your girls? Put on your favorite pair of denim shorts, a solid, pastel v-neck, a pair of super cute sandals and add that hat!


I hope you guys enjoyed today's post. I've obviously grown to like them, and I'm hoping this post helped you choose whether you are going to purchase a sunhat or not! Please leave a comment down below on whether you are going to rock sunhats, or stay away from them completely! Any requests for blogs you would like to see in the future? Comment below (: Don't forget, stay classy!


-Landon


Sunday, May 27, 2012

Review: Mane and Tail

Hey girls! Today I just wanted to do a review of the Mane and Tail Shampoo and the Mane and Tail Moisturizing Texturizing Conditioner. Before I start to go into details I just want to put it out there that I've yet to finish the bottles and you'll see why later on.

While it did make my hair grow faster it did nothing to repair my hair; if anything it made my hair more damaged than before. I have terrible split ends to the point where if I needed them cut off I could have to get a buzz cut or something, it's horrendous. I have very thick, frizzy, coarse and dry hair which is never moisturized enough and extremely hard to style. I don't know why my spilt ends are so bad because I make sure to always use a heat protectant and go extra miles to keep it looking healthy but it never does. After reading reviews online I thought it was going to be a moisturizing set and help my hair get shine and repair.

Shampoo: I'm pretty sure this made my hair drier than it was initially and it completely stripped it of any good oils or shine. Even my sister (who has straight oily hair-the total opposite of mine) used it and asked me why I kept on using it as it even dried out her hair. It promised to increase hair growth which I guess it did, but as I have long hair to begin with I didn't notice a big gain.

Conditioner: I used significantly more of this than the shampoo and I'm actually almost finished with it, but it's not because I loved it or anything. I needed to use so much of it because the shampoo was so drying. I didn't like the consistency at all, it was runny and didn't stay on my hair well, it seemed to slid of a lot. Even thought I used a good amount of it each time I still needed to use a deep conditioner than I usually did.

Overall I'm not going to finish these bottles and I'll most likely end up throwing them away because I'm not going to give them to anyone-they'll probably hate me. I will definitely not be repurchasing ever and my only saving grace was my Matrix Biolage Conditioning Balm, which I use as a deep conditioner. If I didn't use that I don't know where my hair would be right now. Oh well, you win some you lose some, so I'm off to find a new shampoo and conditioner.

Xoxo Audrey :)
"If I'm honest I have to tell you I still read fairy-tales and I like them best of all." -Audrey Hepburn


Thursday, May 10, 2012

Fun Spring Dresses!

Hi Girls! Happy Thursday :)


So today I wanted to share with you a few of my favorite dresses that I have been reaching for this spring. Whether I'm going to school, or out with my friends, a fun dress is a great way to look cute, and feel it too!


This dress is one of the fancier ones, but it's such a simple style and flatters a lot of different figures. It cinches in at my waist and then has the trumpet effect on the bottom half, allowing the fabric to flow out. I love the pink flower detail at the bottom of the dress, it adds a bright pop of color to your look. I bought this at my local Lord and Taylor by the way!


The next dress is an electric magenta color with a cutout triangles along the neckline. I found this at forever 21 for a little under $20 which I thought was a great deal!I love pairing this with a thick brown belt to tie the look together. Since it has such a strong neckline, I don't normally pair a lot of jewelry with it because the dress is so unique it doesn't really need anything else to make it a statement look. Remember, Simple is key with any bright colored dresses, or any dresses with a busy pattern or cutouts.


This dress is a simple cobalt blue, cotton dress that ends mid thigh. It's a tighter dress, which shows off my curves...just kidding I don't have any curves....but that's ok.... :) I like this dress because of its simplicity. It has a stripe design embedded in the dress that looks like ridges which gives the dress a texture. I belted this dress with another bright color because it adds an extra touch and makes the look a little bit more fun!


And last but not least, since summer is almost here, I have to include my favorite dress I have probably ever owned. My sailor dress. I got this at forever 21 for around $17 last year and although it has shrunken quite a bit on me....I still am completely in love with it.Whenever I put it on it reminds me of being at the beach or sailing in the middle of the ocean. I love the nautical look and I love the button detail right at the waist of the dress, and the pockets on the side. ANY POCKETS ON A DRESS MAKE ME SO HAPPY! It gives the dress a more casual feel, and it gives me an excuse to always have my phone or my favorite lipgloss on me at all times. :) Or a snack...because I love snacks... :)


So I hope you enjoyed my little collection of springtime dresses! Comment below on which dress was your favorite and why! Also do you like the idea of having GIF's showing different angles of the outfits? leave your opinion in the comments below! Thanks so much and have a great day! Friday is almost here everyone! 


<3


Kristin :)

Saturday, May 5, 2012

My April Favorites!

Hey girlies! I can't believe it's already May....can you?! Well, since April has come to an end, I thought I would share with you my April Favorites! My favorites consist a blend of makeup, fashion trends, food, songs, and TV shows!


BEAUTY FAVORITES


I tend to think that everyone in the spring time wants to achieve that gorgeous, radiant glow! I think my Nars Lguna Bronzer is absolutely perfect for that! It gives you a hint of color without being overloaded with shimmer and sparkle.


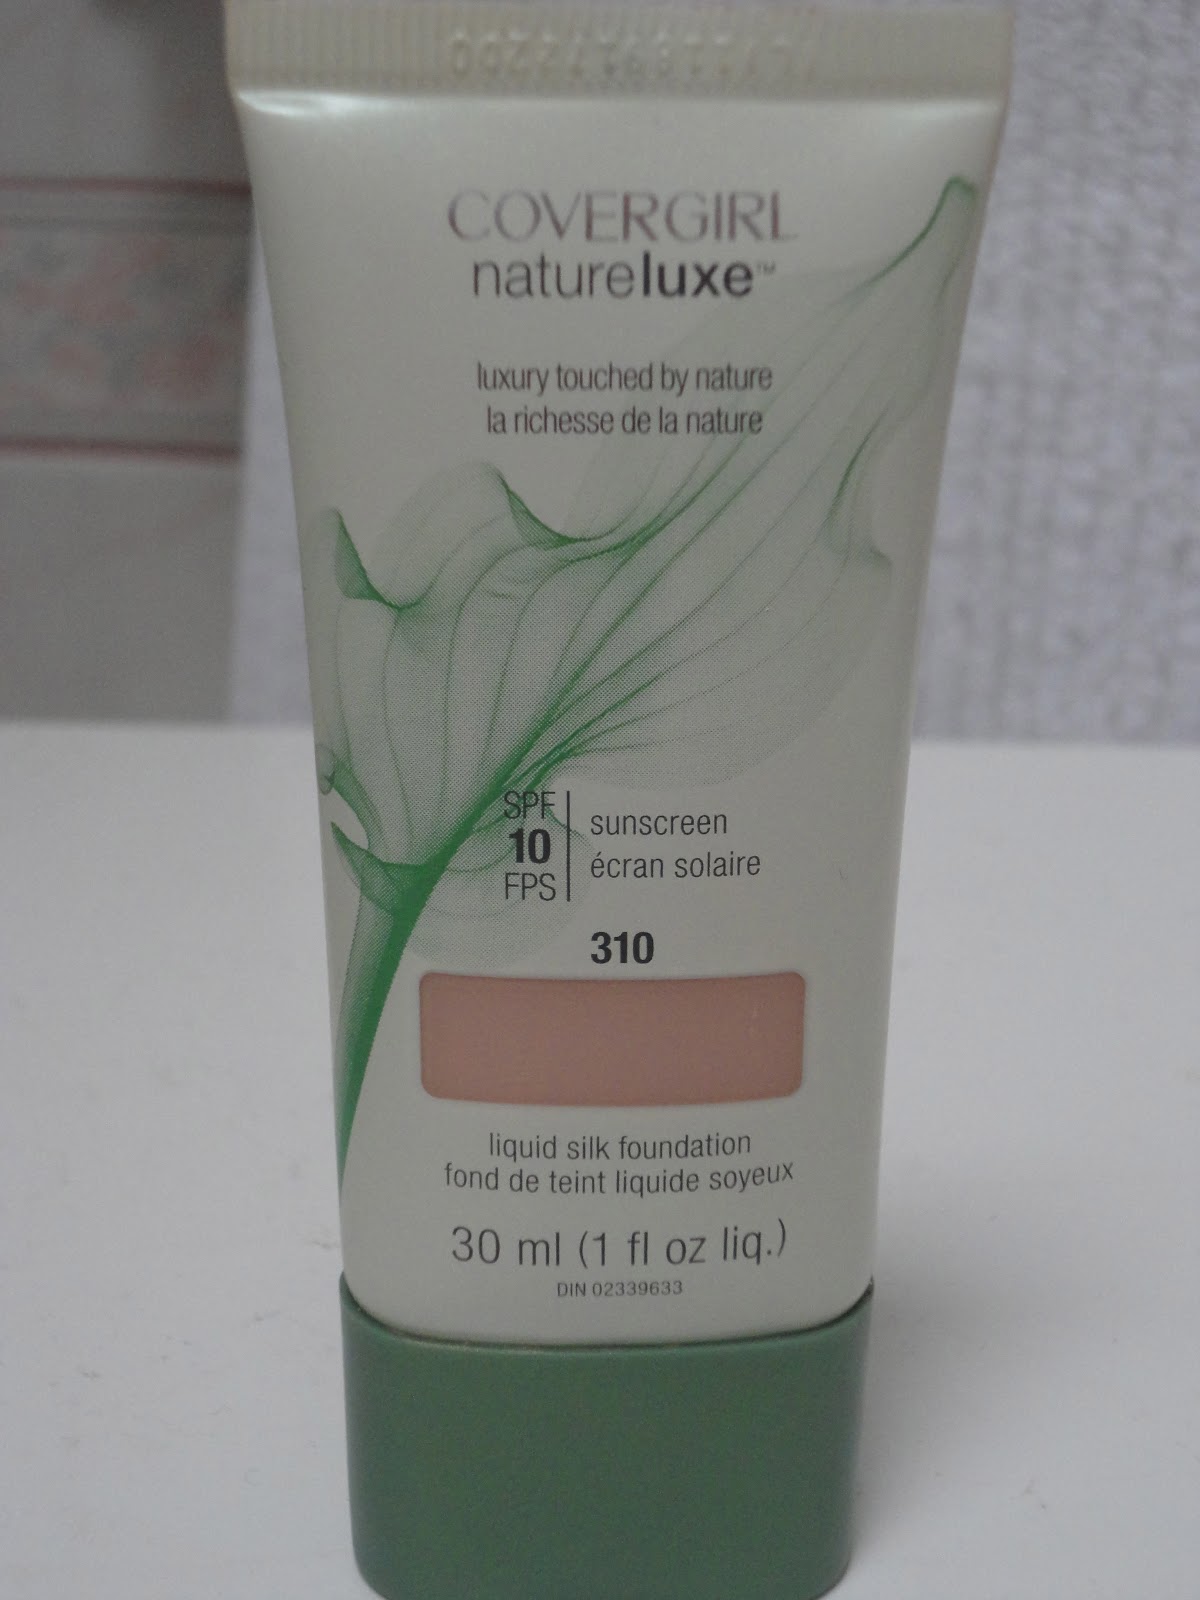
The next makeup item I have been loving during the month of April would be my Covergirl Natureluxe foundation. I know I've mentioned this product in a few other posts (mainly tutorials), but I honestly LOVE it! It gives light to medium coverage, and does not feel to heavy on your skin. It feels really natural, and I would definitely recomend it to you guys. This is a product that I will repurchase if I don't try out any other foundations that I fall in love with! If you would like me to do a comparison between this foundation and a tinted moisturizer, leave me a comment down below!


For my eyes, I have been obsessed with my L'Oreal Million Lashes Mascara! This has honestly been my favorite mascara I have tried in such a long time! It gives you a lot of volume, a nice length to your lashes, and it holds the curl nicely. You can buy this product at any drugstore or Target, so right off of the bat it's rather inexpensive for a great product. I definitely reccomend it to all of you, and I hope you guys get to try it out!


I love a good chapstick...I think anyone does! For the month of April, I've been constantly reaching for my Burt's Bee's Chapstick. Prior to buying the Burt's Bee's, I read an article online (if I can find the article I will link it at the end!) about how some makeup can be very harmful. One of the items on the list was chapstick, because most lip products (such as lip gloss and some chapsticks) base is petroleum jelly. I did some more research to find out that petroleum jelly is used in gasoline, so essentially you were putting an ingredient found in gasoline on your lips. Ew, I know. So continuing my research I found that any ALL NATURAL chapstick or lipgloss was the way to go! I pretty much ran to a CVS and picked up Burt's Bee's. I really like how the product is natural, and how it heals and protects your lips. I would totally try it out if you haven't already! Click here to read the article on the dangers of chapstick and other makeup products. **I'm not anyone to say what you should use or shouldn't use, but this was based on some research that I did, and I felt I should be using something more natural on my lips!**


Hair products you ask? Moroccan Oil! It makes your hair seem like the softest hair in the world, and the amount of shine it gives you is amazing! This product really makes your hair look and feel very hydrated. I wash my hair every other night, so whenever my hair is freshly washed, I will apply a nickle sized amount onto my palm, and distribute it through my hair. It is a little pricey, but once you use it you will fall in love and will need to buy more ;).


Lastly, my favorite beauty product would have to be water!! Water keeps your skin glowing and hydrated, which can help prevent any acne. Lately, I have been drinking at least two bottles of Poland Spring water a day, and I have been so proud of myself! Not only does it help your skin stay refreshed, it helps your body stay hydrated which is an absolute must for the spring and summer time!


NON-BEAUTY FAVORITES


TV Show: Dance Moms! I ADORE these little girls, and the moms are hysterical! If you don't watch, start watching. It is pretty addictive!

Song: I have really been listening to "Worry About You" from 2 am Club, "The Chase Is On" by Hoodie Allen and "Payphone" by Maroon 5! Check out these songs if you guys would like!


Snack: Whenever my mom goes to the grocery store I have one request....Dipps Chewy Bars! You can find them in the granola bar aisle of your grocery store, or wherever Quaker Granola Bars are sold. I love them because its almost a healthier way to enjoy a chocolate treat!


Ok, loooong list of favorites...I know, but it's good that I have had a lot of products I love...right?? Haha well, thank you guys for reading this post, and check out all of our others! Remember, stay classy!


-Landon

Monday, April 30, 2012

Add a Pop of Color to Your Day!

Hey Everyone!


So today I wanted to talk to you all about a new up-and-coming nail trend...moon nails! It was quite a hit in the mid 1900's, and it's now making a comeback! Celebrities from Lady Gaga to Kendall Jenner sport these fun moon styled nails out on the town. If you can see, the bottom half of her nail is actually painted different color, it isn't just chipped polish. Want to find out the secret? Well we aren't called sparkly little secrets for nothing! ;) Keep reading to find out more. :)


***Now, I am not a professional nail stylist so in these pictures you will find mistakes, and I apologize in advance, but it takes a lot of practice to get the crescent to look just right on the nail!***


If you want to re-create this look the first thing you are going to want to do is get some supplies. For this tutorial you are going to need a top and base coat nail polish, as well as your 2 favorite color polishes. (I use 4 different colors just to show different color combinations). You are also going to need any type of hand lotion.(This softens your skin so if you get any polish on your skin through the process it will come off easier later if your skin is soft and moisturized. I am using the EOS hand lotion because I love the way it feels on my skin and it leaves my hands feeling really soft and silky.) The last-and probably most important thing- you will need for this tutorial is reinforcements. These bad boys are the key to making the crescent moon shape on your nails look perfect. Now, it's hard to see in my pictures because my reinforcements are clear, but I'll explain exactly how to apply them when the time comes.


In this tutorial I'm using 3 of my favorite spring colors. On the left is OPI Feelin' Hot-Hot-Hot, then in the middle is Essie Need A Vacation and finally on the right is OPI in A Grape Fit! Fun and Bright and perfect for the spring time!


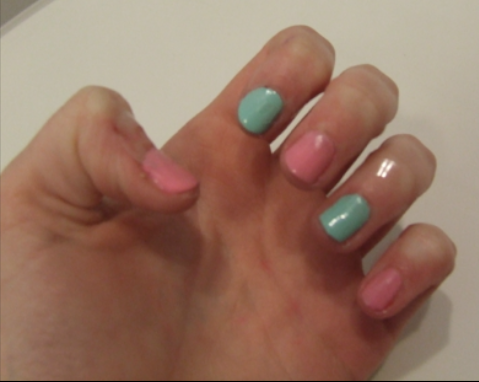
So the first step is to trim and buff all of your nails to make sure they're nicely shaped and don't have any rough edges. Next, quickly paint a sheer base coat just to smooth out any cracks you may have on your nails. This will leave an even base to have the polish be applied to. Next, apply 2-3 thin coats of your favorite lighter polish evenly across the nail. To the left you will see I have 2 different colors...again that is only to show you guys different color options. You need to make sure you let these coats dry so the nails are brittle. You want to put enough color on the nail so it isn't streaky, but not so much that it seems goopy on your nail, because that will cause problems when you stick the reinforcement on it later. Let them dry for a good 20 minutes to make sure they're brittle for the step.


Does this picture seem similar? Well it's practically the same, except for the fact that I added reinforcements to the bottom halves of my nails. I actually added them at different lengths to show the different style of moon shapes you can have. You can put it right near the bottom of your nail like Kendall had it pictured earlier, (that is the classic crescent moon shape) or move the reinforcement higher to make it look like a thick, bright french manicure! I did it both ways to give you guys options.


After you have chosen a length that you would like your reinforcements to be placed at, the next step is to paint over your nails again in a second color. Preferably a darker color then the one you painted your base with. For the light pink I added a darker magenta and for the teal I added a pop of royal purple! If you get some nail polish on the reinforcement that's ok. Just like in the picture to the left, it looks really messy, but that is only because I got some of the polish on the reinforcement.After a few minutes of letting that dry, You can peel the reinforcement off. Leaving *hopefully*nice clean, beautiful crescent moon design on your nails! If the paint peels or sticks to the reinforcement, that's ok. A little touch up with a carefully applied coat will clean that right up. Don't get discouraged it happens to the best of us. It takes a lot of practice to master ;) As you can see the final picture has colors of all different lengths, now when you do this on yourself you would want to make them as close to the same length as possible. And you would probably stick to the same 2 colors on each nail...but feel free to go all out! This is such a fun, easy look so feel free to experiment with different color combinations and glitters and textures! Leave pictures in the comments below if you decide to try this look out because I would love to see new color combinations and any other fun tricks you guys use to paint your nails! Thanks so much and I love you all :)


xoxo-


Kristin :)

p.s. Want me to let you in on another sparkly little secret? If you are anything Like me, you don't enjoy paying upwards of $7 for a nail polish. What if I told you there was a way you didn't have to...but still were able to get the colors you wanted. WELL NOW YOU CAN! Click this link right here to get all of your favorite Orly, Essie, and China Glaze polishes for about half the price! :)

DIY: Body Scrub!

Hey girls! Today I wanted to share with you a really simple, efficient body scrub recipe! I've used it before and it exfoliates gently, but not to the point where it gives you redness on your skin (and this is coming from a girl with sensitive skin!) It works well, as opposed to some other Do it yourself things that never end up working like you wanted them to. All of the ingredients are so simple I bet you have all of them-if not half-in your kitchen right now! That being said let's hop into the ingredients!
What you'll need:
1/2 cup brown sugar
1/2 cup white sugar
2 tablespoons sea salt salt
2 tablespoons avocado or olive oil
1/4 cup of your favorite liquid soap
And the juice from either
One lemon, one lime or
half a grapefruit


For my mixture I chose to use a lime because I feel like a lemon is too acidic on my skin. The soap I used was Kiehl's Liquid Hand Soap in Pear Tree Corner. with the ingredients you want to fist add the two sugars and the salt then gently stir them together. Next, I added the Olive Oil, soap and lime juice and mixed until smooth. I'll include some pics here and include an update later after I use it again!


The last picture is what it looks like when finished! (It looks super gross but I promise is smells and feels ah-mazing) I was scared to try it because I can't stand the smell of brown sugar but once you add the soap it smells so good! You can also add in a few drops of essential oils if you'd like!


Saturday, April 28, 2012

My Everyday Foundation Routine

Hey everyone! I have been using my Covergirl Natureluxe foundation for about 3 weeks now, and I have really been loving how I apply it! So today's post is dedicated to show you how I apply my foundation, and keep in mind you can totally substitute in your foundation and just follow the remaining steps. Let's get started!


Step 1: I apply my Garnier Nutritioniste Skin Renew Anti-Puff Eye Roller underneath my eyes and moisturize my face with Jergens Natural Glow. If I have any blemishes, I will apply my Neutrogena Rapid Clear spot treatment to the problematic area.


Step 2: Next, I take my L'Oreal Magic Perfecting Base and apply an even coat on my face. I suggest using a base because it really helps your makeup go on smoother, minimizes the appearence of your pores, and makes your skin feel softer!


Step 3: Using my fingers I take my Laura Mercier Secret Concealer in shade 1 and apply that under my eyes to hide my dark circles. Also, I take my Physicians Formula Concealer Twins in shade Yellow/Light  and mix the two shades on the back of my hand and apply that concealer mix to any blemishes using my fingers.


Step 4: Then, I take my Covergirl Natureluxe foundation in 310 (Flax) and put a pea sized amount to the back of my hand. Using my ring finger I dot the foundation on my cheeks, forehead, under my neck, under my eyes, and a small amount on my nose and chin. Taking my Sigma F60 Foundation brush, I blend the dotted foundation all over my face.


Step 5: I then take my Sigma F30 Powder Brush and put my Maybelline Dream Matte powder all over my face to set the foundation. Then, I take my Nars Laguna Bronzer and a Sonia Kashuk face brush. I contour my cheeks and then apply a light dusting of the bronzer to the rest of my face for a bit of color.


Step 6: For the final step, I apply a natural blush such as Ladyblush by Mac to the apples of my cheeks.


Now you're done! Even though my routine is six steps, it takes me literally 5 minutes to do in the morning. I love how the finished look is super natural, and it gives me just enough coverage to feel even more confident! Keep in mind, this is just what I do for my everyday face makeup and you can totally swap in the products that work for you. I'd love to hear what your foundation routine is in the comments below! Remember, stay classy everyone!


-Landon